What are operating systems?
Functions of Operating System
An operating system is oversee hardware use.
1. Directs operational resource
control use of CPU, memory, peripheral devices.
hardware resource be allocate applications.
2. Enforces working policies
fair resource access, limits to resource usage.
3. Mitigates difficulty of complex tasks
abstract hardware details. (system calls)
Operating System Definition
- Directly has privileged access to the underlying hardware
- Hides the hardware complexity
- Manages hardware on behalf of more applications according
- It Ensures that applications are isolated and protected from one another
Operating System Examples
Embedded Environment
OS Elements
- Abstractions (Managed the harddisk and memory etc hardware resources)
- process, thread, file, socket, memory page
- Mechanisms (Application access to hardware resource)
- create, schedule, open, write, allocate
- Policies (How do mechanisms will be used to manage the access to hardware)
- last-recently used (LRU), earliest deadline first (EDF)
Ubuntu 22.04 apt update でエラー "jammy-security/InRelease is not valid yet" の解決方法

はじめに
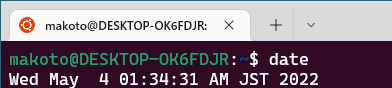
WSL2でUbuntu22.04を利用した際 apt update で日時設定が原因のエラーが発生したので解決方法を書き残します、
利用環境
・Windows10 Pro
WSL2からUbuntu22.04を利用しています。
解決方法
dateコマンドを使用してUbuntuの日時に現在の正しい日時を設定します。
今回は 2022/5/4 18:24:00 に設定しました。
sudo date -s "05/04 18:24 2022"

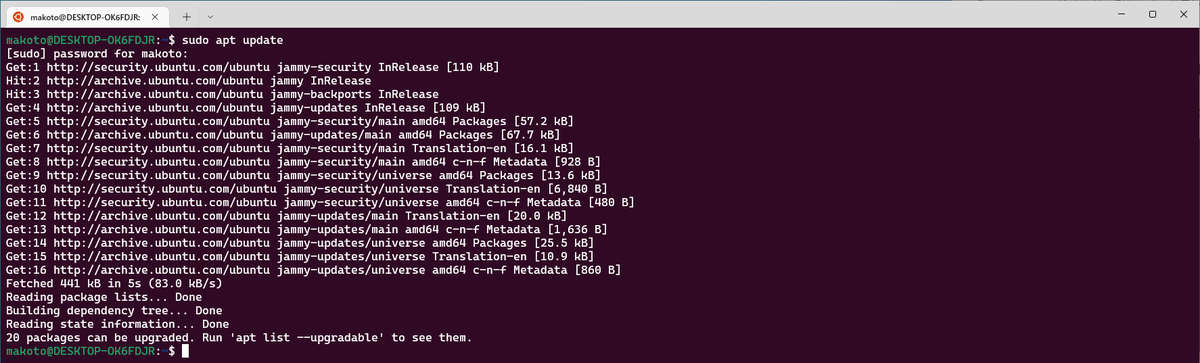
正しい日時を設定したらapt updateが正常に実行できることを確認します。
他に試したこと
以下は解決方法とならなかった内容ですが、書き残しておきます。
1. Windowsの日時に現在の正しい日時を設定
ホストOSとなるWindowsの日時もUbuntuと同じようにずれていたのでWindowsの日時を現在時刻と合わせたのですが、WSL2のUbuntuと共有の設定では無いようで反映されませんでした。
2. hwclock --hctosys コマンドの実行
コマンドはUbuntuで実行できた様子ですが日時の変更まではできませんでした。
WSLのapt updateでRelease file is not valid yetと言われたらWSLの時刻がずれてるかも。 | Ginpen.com
AnsibleからPostfixを設定してcronからメールを送信する

- はじめに
- 利用環境
- Postfix とは
- 1. playbook.yml 送信先メールアドレスの編集
- 2. playbook.yml ドメイン名の編集
- 3. inventry.ini の編集
- 4. playbook.yml の実行
- 5. メール送信の確認
- cron メール送信ログ
- postfix 設定ファイル
- 参考資料
はじめに
今回はcronの実行時にメールを送信する機能を使って死活監視を行います。
Postfix や cron の設定は最終的にAnsibleから行えるようにしました。
Ansible は以前に行ったcronの設定を参考にしています。
knkomko.hatenablog.com
Ansible の YAML は以下のリポジトリに保存しています。
github.com
Postfix とは
メール転送エージェント (Mail Transfer Agent、略称 MTA) の一種です。
cron からメールを送信する為には、メール配信を行うMTA が必要になります。
初めはMTAが無い状態でメール送信を行い、以下のエラーが発生していました。
$sudo cat /var/log/cron.log

Aug 11 07:07:01 ubuntu-cron CRON[378]: (root) CMD (echo 'test')
Aug 11 07:07:01 ubuntu-cron CRON[377]: (CRON) info (No MTA installed, discarding output)
1. playbook.yml 送信先メールアドレスの編集
job の sample@gmail.com を実在するメールアドレスに変更します。
  - name: Setup cron env
    cron:
      name: MAILTO
      user: root
      job: sample@gmail.com
      env: true
2. playbook.yml ドメイン名の編集
Postfix のインストール前に debconf を使用して設定値を保存しておきます。
debconf を使うとインストール時の設定画面を操作することなく自動で行えます。
今回ドメイン名の設定値は example.com としています。
このドメイン名は実在しなくてもメール送信が可能でした。
  - name: Setup postfix using debconf
    debconf:
      name: postfix
      question: "{{ item.question }}"
      value: "{{ item.value }}"
      vtype: "{{ item.vtype }}"
    with_items:
      - { question: postfix/main_mailer_type, value: "Internet Site", vtype: select }
      - { question: postfix/mailname, value: "example.com", vtype: string }
3. inventry.ini の編集
①IPアドレス
cron を実行するサーバのIPアドレスを変更します。
今回は 192.168.11.41 に設定しています。
②SSH接続ポート番号
ansible_port でSSH接続のポート番号を接続先に合わせます。
今回は 22 に設定しています。
③SSH接続ユーザー
ansible_ssh_user でSSH接続のユーザーを接続先に合わせます。
今回は ubuntu に設定しています。
[target]
192.168.11.41

[target:vars]
ansible_python_interpreter=/usr/bin/python3
ansible_port=22
ansible_ssh_user=ubuntu
4. playbook.yml の実行
$ ansible-playbook -i inventry.ini playbook.yml --ask-pass --ask-become-pass
今回 ansible-playbook を実行した時に以下のエラーが表示されました。
Using a SSH password instead of a key is not possible because Host Key checking is enabled and sshpass does not support this. Please add this host's fingerprint to your known_hosts file to manage this host.
管理対象サーバの fingerprint が登録されてないことが原因のようです。
今回 fingerprint の登録が無くても実行できるように ansible.cfg を変更しました。
$sudo vi /etc/ansible/ansible.cfg

# Add ssh_args option "-o StrictHostKeyChecking=no"
#ssh_args = -o ControlMaster=auto -o ControlPersist=60s
ssh_args = -o ControlMaster=auto -o ControlPersist=60s -o StrictHostKeyChecking=no
5. メール送信の確認
playbook.yml で指定したメールアドレスに送信できていることを確認します。
Postfix で指定したドメイン名 example.com が送信元として記載されています。

cron が1分間隔で実行されるため、実行に応じてメールが送信されます。
実行されている cron を確認すると MAILTO にアドレスが指定されています。
ubuntu@ubuntu-postfix:~$ sudo cat /var/spool/cron/crontabs/root
[sudo] password for ubuntu:
# DO NOT EDIT THIS FILE - edit the master and reinstall.
# (/tmp/crontabevts3ezv installed on Thu Aug 12 12:28:39 2021)
# (Cron version -- $Id: crontab.c,v 2.13 1994/01/17 03:20:37 vixie Exp $)
MAILTO="sample@gmail.com"
#Ansible: mailtest
* * * * * bash echo 'test'
cron メール送信ログ
cron からメール送信を行ったログは mail.log に保存されています。
$sudo cat /var/log/mail.log
以下はメール送信に成功したログを抜粋した内容になります。
Aug 12 10:48:12 ubuntu-cron postfix/pickup[14908]: 50FFA390386: uid=1000 from=<ubuntu>
Aug 12 10:48:12 ubuntu-cron postfix/cleanup[14964]: 50FFA390386: message-id=<20210812104812.50FFA390386@example.com>
Aug 12 10:48:12 ubuntu-cron postfix/qmgr[10365]: 50FFA390386: from=<ubuntu@example.com>, size=280, nrcpt=1 (queue active)
Aug 12 10:48:12 ubuntu-cron postfix/smtp[14966]: connect to gmail-smtp-in.l.google.com:25: Network is unreachable
Aug 12 10:48:14 ubuntu-cron postfix/smtp[14966]: 50FFA390386: to=<sample@gmail.com>, relay=gmail-smtp-in.l.google.com:25, delay=62, delays=60/0.01/1/0.7, dsn=2.0.0, status=sent (250 2.0.0 OK  253 - gsmtp)
Aug 12 10:48:14 ubuntu-cron postfix/qmgr[10365]: 50FFA390386: removed
postfix 設定ファイル
メール送信等の設定を変更する場合は main.cf から変更を行います。
$sudo cat /etc/postfix/main.cf
手動で main.cf を変更した場合は postfix の再起動が必要です。
$sudo service postfix restart
今回 ansible から設定した内容になります。
# See /usr/share/postfix/main.cf.dist for a commented, more complete version


# Debian specific:  Specifying a file name will cause the first
# line of that file to be used as the name.  The Debian default
# is /etc/mailname.
#myorigin = /etc/mailname

smtpd_banner = $myhostname ESMTP $mail_name (Ubuntu)
biff = no

# appending .domain is the MUA's job.
append_dot_mydomain = no

# Uncomment the next line to generate "delayed mail" warnings
#delay_warning_time = 4h

readme_directory = no

# See http://www.postfix.org/COMPATIBILITY_README.html -- default to 2 on
# fresh installs.
compatibility_level = 2

# TLS parameters
smtpd_tls_cert_file=/etc/ssl/certs/ssl-cert-snakeoil.pem
smtpd_tls_key_file=/etc/ssl/private/ssl-cert-snakeoil.key
smtpd_use_tls=yes
smtpd_tls_session_cache_database = btree:${data_directory}/smtpd_scache
smtp_tls_session_cache_database = btree:${data_directory}/smtp_scache

# See /usr/share/doc/postfix/TLS_README.gz in the postfix-doc package for
# information on enabling SSL in the smtp client.

smtpd_relay_restrictions = permit_mynetworks permit_sasl_authenticated defer_unauth_destination
myhostname = ubuntu-postfix
alias_maps = hash:/etc/aliases
alias_database = hash:/etc/aliases
myorigin = /etc/mailname
mydestination = $myhostname, example.com, ubuntu-postfix, localhost.localdomain, localhost
relayhost =
mynetworks = 127.0.0.0/8 [::ffff:127.0.0.0]/104 [::1]/128
mailbox_size_limit = 0
recipient_delimiter = +
inet_interfaces = all
inet_protocols = all
DockerでAnsibleを使ってPostgreSQLをインストールする
フォルダ構成
C:\docker\ansible-psql\
│  docker-compose.yml
│  inventry.ini
│  playbook.yml
│
├─ansible\
│     Dockerfile
│
└─target\
    │  Dockerfile
    │
    └─home\
playbook.yml
PostgreSQLのインストール後にサービスを起動しています。
- name: Postgre SQL
  hosts: target
  tasks:
   - name: Install PostgreSQL
     apt: name=postgresql update_cache=true state=present
   - name: PostgreSQL service is running
     service: name=postgresql state=started enabled=yes
Docker コンテナの起動
# docker-compose.yml のディレクトリに移動
$cd C:\docker\ansible-psql\
# コンテナの起動
$docker compose up -d --build
inventory.ini の変更
Ansibleからcronの設定を行うコンテナのIPアドレスを inventory.ini に入力します。
今回は 172.27.0.2 と記載していますが、環境に合わせて変更が必要です。
[target]
172.27.0.2

[target:var]
ansible_python_interpreter=/usr/bin/python3
コンテナのIPアドレスは内部で起動しているUbuntuに接続すると確認できます。
# target コンテナに接続
$docker exec -it target bash
# IPアドレスの確認
$hostname -i
playbook.yml の実行
ansible のコンテナに接続してAnsibleから PostgreSQL をインストールします。
今回SSH接続のパスワードは password としています。
# ansible コンテナに接続
$docker exec -it ansible bash
# Ansibleから PostgreSQL のインストール
$ansible-playbook -i inventry.ini playbook.yml --ask-pass

SSH password:

PLAY [Postgre SQL] ************************************************************************************************************************************************************************************************************************************************************

TASK [Gathering Facts] ********************************************************************************************************************************************************************************************************************************************************
ok: [172.27.0.2]

TASK [Install PostgreSQL] *****************************************************************************************************************************************************************************************************************************************************
changed: [172.27.0.2]

TASK [Ensure the PostgreSQL service is running] *******************************************************************************************************************************************************************************************************************************
changed: [172.27.0.2]

PLAY RECAP ********************************************************************************************************************************************************************************************************************************************************************
172.27.0.2                 : ok=3    changed=2    unreachable=0    failed=0    skipped=0    rescued=0    ignored=0
PostgreSQL の接続
インストールしたPostgreSQLに接続するため target コンテナに接続します。
ユーザーを postgres に変更した後 psql を使って接続できることを確認します。
# target コンテナに接続
$docker exec -it target bash
# postgres ユーザに変更
$su - postgres
# PostgreSQL に接続
$psql -U postgres -d postgres
DockerでAnsibleを使ってcronを設定する
- はじめに
- フォルダ構成
- cron の設定内容
- Docker コンテナの起動
- inventory.ini の変更
- playbook.yml の実行
- cron ファイルの確認
- cron の動作確認
- cron の実行ログ
- 参考資料
フォルダ構成
C:\docker\ansible-cron\
│  docker-compose.yml
│  inventry.ini
│  playbook.yml
│
├─ansible\
│     Dockerfile
│
└─target\
    │  Dockerfile
    │
    └─home\
cron の設定内容
Ansible を使うため playbook.yml に cron の設定内容を記載しています。
1分間隔で /var/log/test.log に test の文字列を追記することにしました。
- hosts: target
  tasks:
  - name: "setup cron"
    cron:
      name: "create log"
      minute: "*"
      hour: "*"
      day: "*"
      job: "echo 'test' >> /var/log/test.log"
Docker コンテナの起動
# docker-compose.yml のディレクトリに移動
$cd C:\docker\ansible-cron\
# コンテナの起動
$docker compose up -d --build
inventory.ini の変更
Ansibleからcronの設定を行うコンテナのIPアドレスを inventory.ini に入力します。
今回は 192.168.16.2 と記載していますが、環境に合わせて変更が必要です。
[target]
192.168.16.2

[target:var]
ansible_python_interpreter=/usr/bin/python3
コンテナのIPアドレスは内部で起動しているUbuntuに接続すると確認できます。
# target コンテナに接続
$docker exec -it target bash
# IPアドレスの確認
$hostname -i
playbook.yml の実行
ansible のコンテナに接続してAnsibleから cron の設定を行います。
今回SSH接続のパスワードは password としています。
# ansible コンテナに接続
$docker exec -it ansible bash
# Ansibleから cron の設定
$ansible-playbook -i inventry.ini playbook.yml --ask-pass

SSH password:

PLAY [target] *******************************************************************************************************************************************************************
TASK [Gathering Facts] **********************************************************************************************************************************************************
ok: [192.168.16.2]
TASK [setup cron] ***************************************************************************************************************************************************************
changed: [192.168.16.2]
PLAY RECAP **********************************************************************************************************************************************************************
192.168.16.2               : ok=2    changed=1    unreachable=0    failed=0    skipped=0    rescued=0    ignored=0
cron ファイルの確認
今回設定した内容は root のファイル名で記載されています。
$cat /var/spool/cron/crontabs/root

# DO NOT EDIT THIS FILE - edit the master and reinstall.
# (/tmp/crontab2yp2i8ru installed on Sun Jul 18 14:24:59 2021)
# (Cron version -- $Id: crontab.c,v 2.13 1994/01/17 03:20:37 vixie Exp $)
#Ansible: create log
 * * * * * echo 'test' >> /var/log/test.log
cron の動作確認
1分間隔で文字列が追記されていることを確認します。
$cat /var/log/test.log
test
test
test
cron の実行ログ
デバックをする際に使用したので忘備録として残します。
rsyslog の設定ファイルから cron の実行ログを残すように変更を行います。
# rsyslog の設定を変更
$vi /etc/rsyslog.d/50-default.conf
# コメントアウトを外す
cron.* /var/log/cron.log
設定を反映させるために rsyslog のサービスを再起動します。
$service rsyslog restart
cron の実行ログは /var/log/cron.log から確認できます。
$cat /var/log/cron.log

Jul 18 14:25:01 7a07b9e45953 CRON[554]: (root) CMD (echo 'test' >> /var/log/test.log)
Jul 18 14:26:01 7a07b9e45953 CRON[567]: (root) CMD (echo 'test' >> /var/log/test.log)
Jul 18 14:27:01 7a07b9e45953 CRON[569]: (root) CMD (echo 'test' >> /var/log/test.log)
Write Excel file using Apache POI in Android


build.gradle
implementation 'org.apache.poi:poi:3.17'
MainActivity
Strage Access Framework を使用してExcelファイルを保存しています。
private fun createFile() {
    val current = LocalDateTime.now()
    val formatter = DateTimeFormatter.ofPattern("yyyyMMdd_HHmmss")
    val formatted = current.format(formatter)
    val fileName = "${formatted}.xlsx"
    val intent = Intent(Intent.ACTION_CREATE_DOCUMENT)
    intent.addCategory(Intent.CATEGORY_OPENABLE)
    intent.type = "application/vnd.openxmlformats-officedocument.spreadsheetml.sheet"
    intent.putExtra(Intent.EXTRA_TITLE, fileName)
    startActivityForResult(intent, CREATE_FILE)
}
HSSFWorkbook、HSSFSheet、HSSFRow、HSSFCell、でセルを指定します。
セルへの書き込みは hssfCell.setCellValue*1 で行っています。
最後は hssWorkbook.write(outputStream) でExcelファイルを保存しています。
override fun onActivityResult(requestCode: Int, resultCode: Int, data: Intent?) {
    super.onActivityResult(requestCode, resultCode, data)
    if (requestCode == CREATE_FILE && resultCode == Activity.RESULT_OK) {
        if (data != null) {
            var uri: Uri? = data.data

            var hssfWorkbook: HSSFWorkbook = HSSFWorkbook()
            var hssfSheet: HSSFSheet = hssfWorkbook.createSheet()

            var count: Int = 0
            for (y in 0..5) {
                var hssfRow: HSSFRow = hssfSheet.createRow(y)
                for (x in 0..5) {
                    var hssfCell: HSSFCell = hssfRow.createCell(x)
                    hssfCell.setCellValue((count++).toString())
                }
            }

            try {
                if(uri != null) {
                    applicationContext.contentResolver.openOutputStream(uri).use { outputStream ->
                        hssfWorkbook.write(outputStream)
                    }
                }
            } catch (e: Exception) {
                e.printStackTrace()
            }
        }
    }
}
参考資料
How to create an Excel file from your Android App? - YouTube
[Android] Storage Access Framework でドキュメントを保存する
*1:count++).toString(
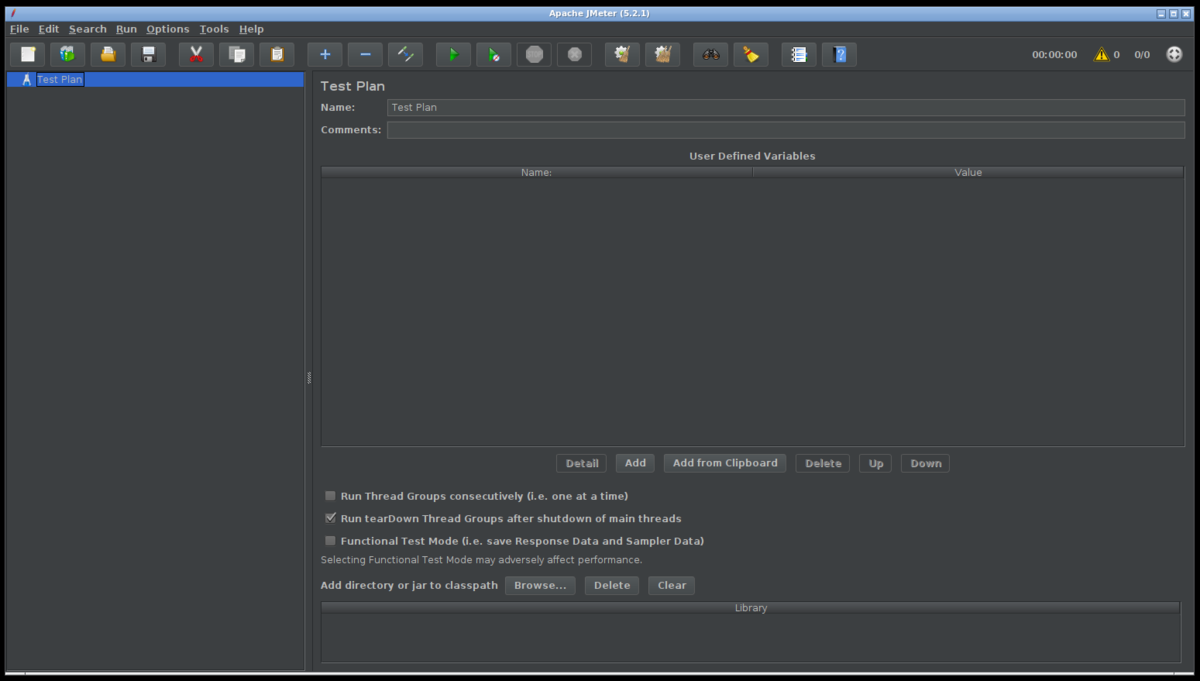
Ubuntu 20.04 GUI版JMeterをDockerで起動する

使用するファイル
C:\
│  docker-compose.yml
│
├─home\
└─ubuntu\
        Dockerfile
docker-compose.yml
version: '3'

services:
   app:
     build:
      context: ./ubuntu/
      dockerfile: ./Dockerfile
     ports:
      - '2222:22'
      - '13389:3389'
     tty: true
     container_name: ubuntu20.04
     volumes:
      - ./home:/home
Dockerfile
FROM ubuntu:20.04

RUN apt update
RUN apt install -y openssh-server
RUN mkdir /var/run/sshd
RUN echo 'root:password' | chpasswd
RUN sed -ri 's/^#?PermitRootLogin\s+.*/PermitRootLogin yes/' /etc/ssh/sshd_config

# SSH login fix. Otherwise user is kicked off after login
RUN sed 's@session\s*required\s*pam_loginuid.so@session optional pam_loginuid.so@g' -i /etc/pam.d/sshd

ENV NOTVISIBLE "in users profile"
RUN echo "export VISIBLE=now" >> /etc/profile

EXPOSE 22
ENTRYPOINT [ "/usr/sbin/sshd", "-D" ]

RUN apt-get update
RUN echo y | apt-get upgrade

# JMeter
RUN echo y | apt-get install openjdk-8-jdk
RUN cd /opt
RUN wget http://ftp.meisei-u.ac.jp/mirror/apache/dist//jmeter/binaries/apache-jmeter-5.2.1.tgz
RUN tar xvzf apache-jmeter-5.2.1.tgz
RUN echo "export PATH=$PATH:/opt/apache-jmeter-5.2.1/bin" >> ~/.bashrc

EXPOSE 3389
RDP サーバ xrdp インストール
$apt-get install xrdp
デスクトップ環境 lxde インストール
$apt-get install lxde
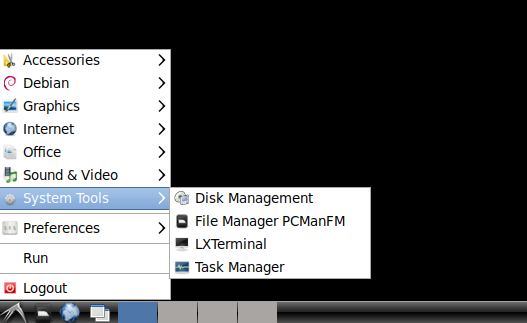
Windows からリモートデスクトップ接続
Ubuntuにリモートデスクトップ接続します。
localhost:13389
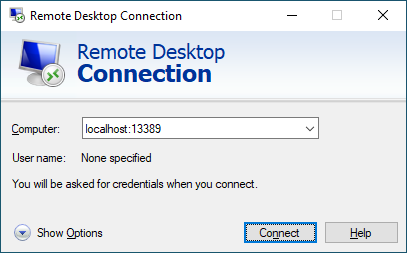
root でログインします。
username: root
password: password

Ubuntuにリモートデスクトップ接続できる事が確認できます。